Starting 1 November 2025, the new aged care funding scheme, Support at Home, will bring changes for support workers and people who receive aged care funding.
One major change is the requirement to list each service you provide in a session with a client, so that your client’s personal contributions can be accurately calculated.
New service categories
This change also aligns with the newly defined service types, which are slightly different to those under the existing Home Care Package program.
- Clinical supports
- Independence
- Everyday living
Each category has a different contribution level. The contribution amount for each service type is determined by a person’s pension status.
| Contribution category | Service type | Contributions |
|---|---|---|
| Clinical supports | Allied health and therapeutic services | 0% |
| Nursing care | ||
| Independence | Personal care | 5% – 50% |
| Social support and community engagement | ||
| Transport | ||
| Everyday living | Domestic assistance | 17.5% – 80% |
| Home maintenance and repairs | ||
| Meals |
For example, a full pensioner will contribute 5% towards the cost on independence, while someone who is self-funded without a Commonwealth Seniors Health Care will contribute 50%.
New government requirements
As a result of these changes, the current system of providing a description of services with your support notes doesn’t meet these new government requirements.
We also understand that support workers often provide multiple services in one session that might be charged at different rates.
To make sure your invoices align with the new Support at Home requirements, we’ve updated our system to allow you to specify what services you have provided, and for how long in the session.
How to add multiple services
You can add multiple services through either the desktop or mobile app version of your dashboard. We’ll give you the step-by-step instructions for the mobile app below.
Adding services and choosing rates
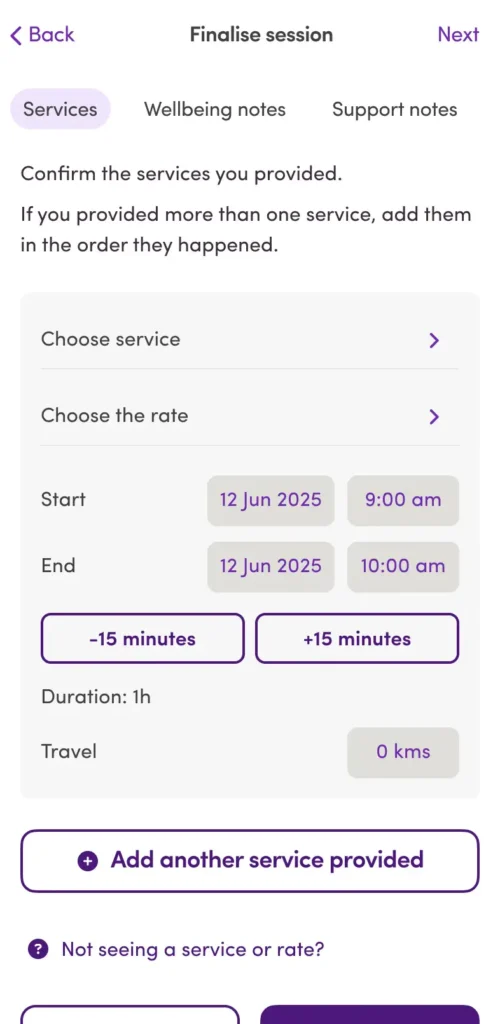
- After checking out of a session, select Confirm services and rates.
- Select Choose service.
- a. If your agreement only lists one service, the system will automatically add that service.
b. If your agreement lists multiple services, you'll need to select the specific service from the dropdown menu. - To update the date and times of when a session started or ended, tap the box with the time and use the dial to set the correct time
- Select Confirm.
- In the Choose rate section, select the hourly rate from the list of rates.
- If you travelled during the session, add the distance travelled in the Travel section to calculate the travel rates.
- Select Add service to add the service to the session.
- If you provided multiple services in a session, follow the same steps for the next service you provided.
- Add your support notes and select if you need to report an incident.
- Select Check out and submit to submit the support hours.
Important
- Make sure you select the correct rate for the service you’re providing. Choosing the wrong rate might result in rejected hours by the client.
- The start time of a new service is automatically filled based on the end time of the previous service added to the session.
- If there is a gap in time between services, it will automatically add an unpaid break to your support hours.
Rejected support hours
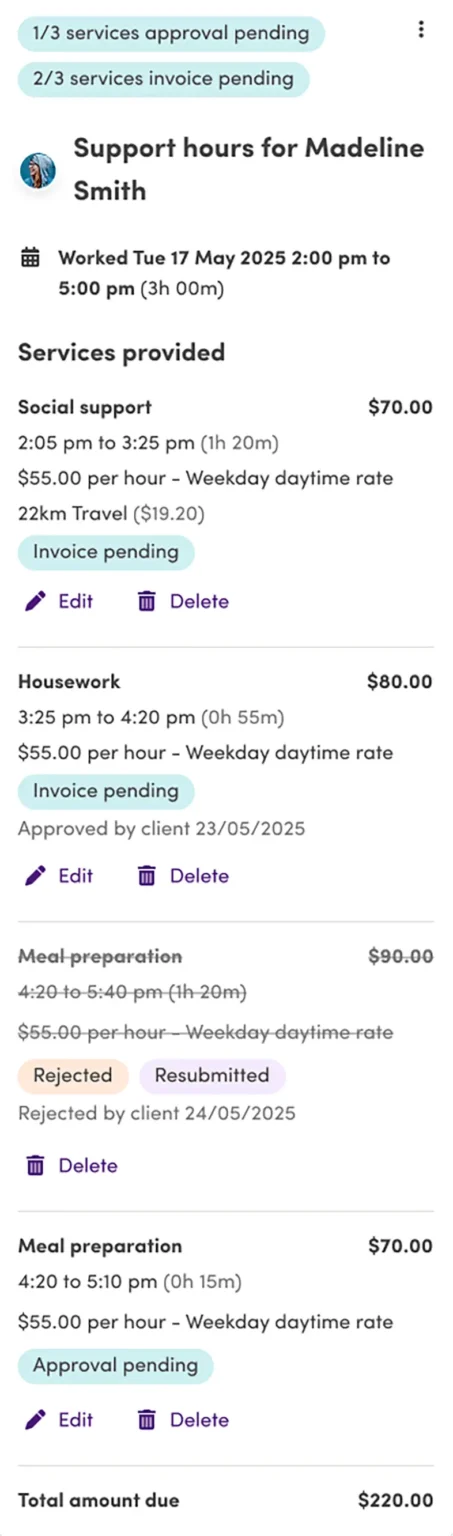
When a client rejects support hours, they might reject individual services or entire sessions.
If a client rejects some services while approving others, payment will still be processed for the approved services, while you work with the client on approving the rejected services.
Common reasons for rejection include:
- Incorrect times or dates
- Wrong services selected
- Incorrect rates applied
Clients don’t need to provide a reason for rejecting support hours. We do recommend contacting your client first to confirm what changes you plan to make before resubmitting the support hours.
How to resubmit support hours
- Rejected hours will have a Services rejected badge.
- Select Resubmit rejected services to review the details for the rejected service
- Select Resubmit to update the service.
- Make the necessary changes to the services.
- Select Confirm changes.
- A Resubmitted badge will appear next to the services you resubmitted, and the original services will be crossed out with the updated service below.
- Select Submit to send the updated services to your client for review.
- When the client accepts the resubmitted services, the badge will change to Invoice pending.

Submitting support hours later or for unplanned sessions in advance
-
Select Sessions in the bottom menu.
-
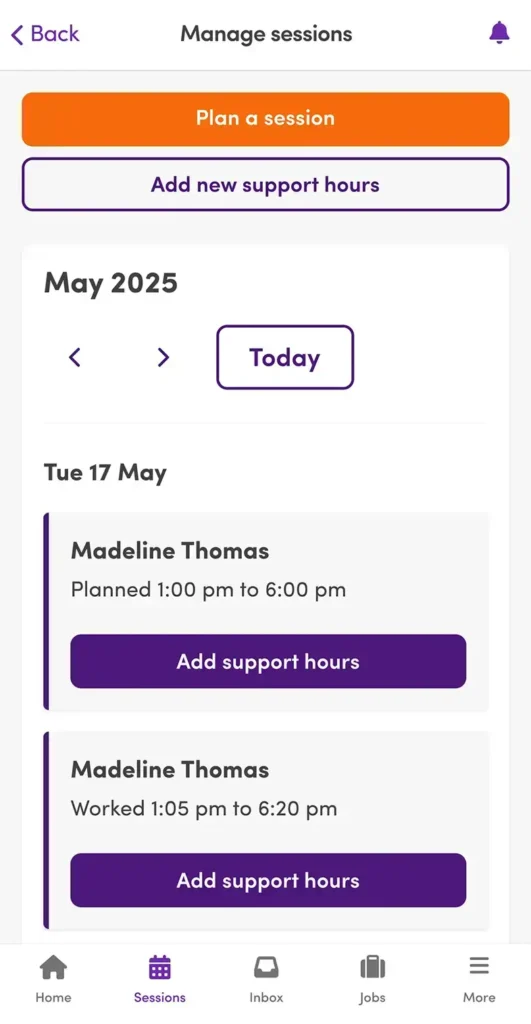
Select Add new support hours located under the session details.
- Follow the same steps to submit support hours as above.
If you would like to learn more about how these changes affect clients, you can find out more about how clients approve and reject support hours in the new system.